
How to use Forex advisors
Recently, most traders have been trying to switch to automatic trading, making custom-made various advisors, or simply downloading and setting up experts from our website.
Usually, traders are familiar with how to install an advisor in a trading terminal, but most beginners do not even understand the basic principles of the trading terminal, not to mention installing experts and their basic settings.
In order to install a Forex advisor, you need to download it from our website in the advisors . The section contains both demo versions and completely free versions of robots.
Next, launch your trading terminal and use the file menu to enter the data directory. You can see an example in the picture:
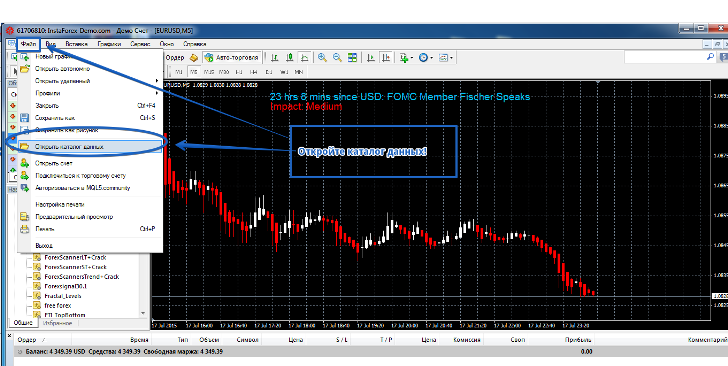
Then in the directory that opens, enter the expert folder and paste the downloaded file. If the advisor was created based on an indicator, then simply drop it into the indicators folder. Very often, owners try to protect their work, so in addition to an expert, you may encounter a file with the ending dll. This file is a library, so it also needs to be copied and pasted through the data directory, but into a folder called Libraries. If you copied all the files, then after restarting the expert it should appear in the list of advisors.
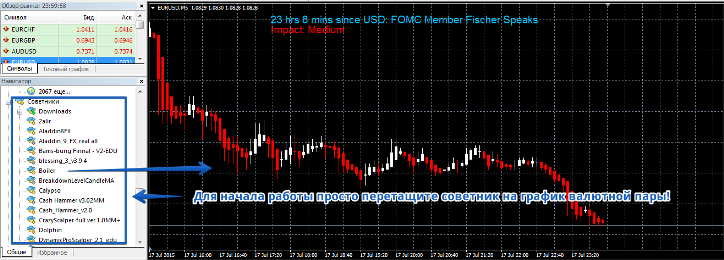
To start working as an expert, simply drag it onto the chart of a currency pair. When you do this, the main settings of the advisor will appear in front of you. Be sure to make sure that the general checkboxes are in this order:

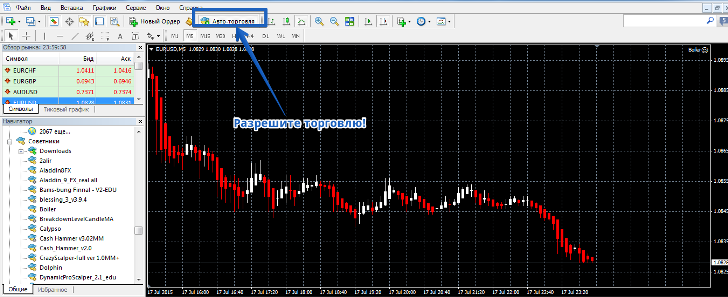
After you add a trading expert, you need to find the icon on the toolbar and allow the expert to trade. You can see an example in the picture:
There are times when an expert does not start trading. This is due to the fact that auto trading is disabled in the main settings of the trading terminal. To enable it, go to the service tab and open the settings menu. In the variety of options, find the “Advisors” tab and check the boxes as shown in the picture below:
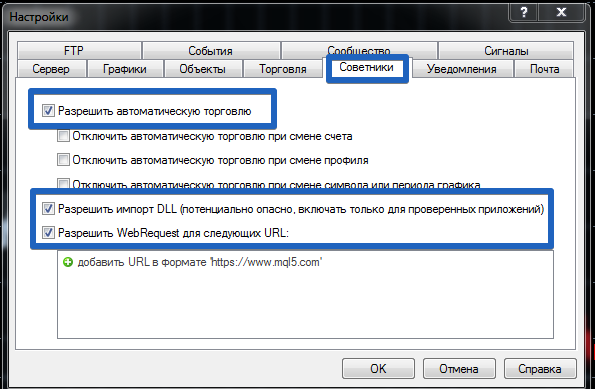
After this kind of settings, the expert should start trading. Moreover, I note that the last setting item needs to be done only once. And now I would like to talk to you about the basic settings that are present in almost any Expert Advisor.
The first thing that is present in almost any advisor is the trading lot settings. In the Expert Advisor settings, it itself is most often displayed as Lot or an abbreviated version of LT. By adjusting the values of the lot line, you can either increase or decrease the trading lot that the expert will work with.
Thus, you can influence the risks in almost any Expert Advisor. Also, any expert contains profit and stop order settings. In the settings, they are most often designated as Take Profit and Stop Loss, and even more often designated as TP and SL.
These parameters are most often optimized for each trading instrument, since the price range is different for different pairs. For example, if the stop loss on the pound is usually short, then on the euro pair it is much larger, since the price range is larger there.
Also, almost all advisors have a Magic settings line in which the code is written. It is necessary so that the expert does not confuse his transactions with positions that are opened manually. If you come across a martingale-based advisor, then it always has settings for multiplying the trading lot, which is designated as LotExponent and Multiplier. Perhaps these are the basic settings that are present in any Expert Advisor. Now let's look at how to configure them.
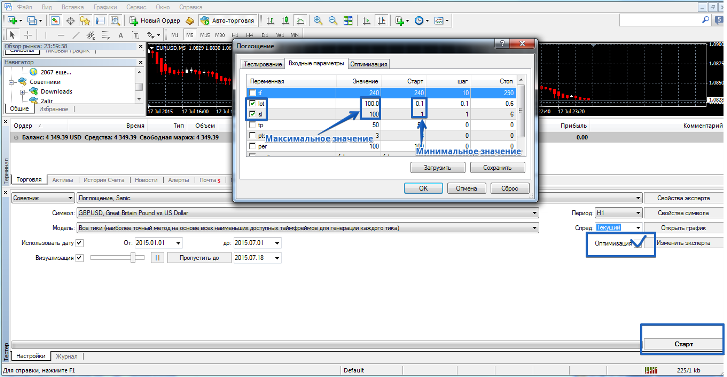
To get started, log into the strategy tester. In the tester menu, check the box next to optimization. Next, enter the expert settings and opposite the start column in the values, set the minimum parameter from which you would like to optimize and the maximum, which, in your opinion, is acceptable. Then enter the main tester window and click start. After optimization, the trading terminal will give you possible settings that would give you profit.
After reading this, it may seem to you that installing the advisor is a labor-intensive process, but in fact it will take no more than 5 minutes of your time. Unlike installation, optimizing settings is a more labor-intensive process, however, you must remember that your success depends on the correct parameters that you select. Thanks for your attention, good luck!