
Advisor designer – Ensed Cor
Modern trading conditions make it possible to significantly simplify and automate the Forex trading process.
The emergence of various exchange terminals, and especially the series Meta Trader made it possible not only to trade via the Internet, but also to create your own software products, up to the complete automation of trade by creating robots.
However, the implementation of their own ideas requires the trader to either have programming knowledge or a large wallet to pay for the services of programmers.
Naturally, this could not continue for long, so special advisor designers were born, thanks to which you can create your own trading robots.
Installing the Ensed Cor constructor
The installation procedure for this designer is comparable to the procedure for installing any third-party program on your computer, namely, after downloading the program at the end of the article, you will need to run the installation file.
The next step you will need to do is to specify the installation path and start the process. After installation, the program will immediately prompt you to specify the path to the terminal data directory.
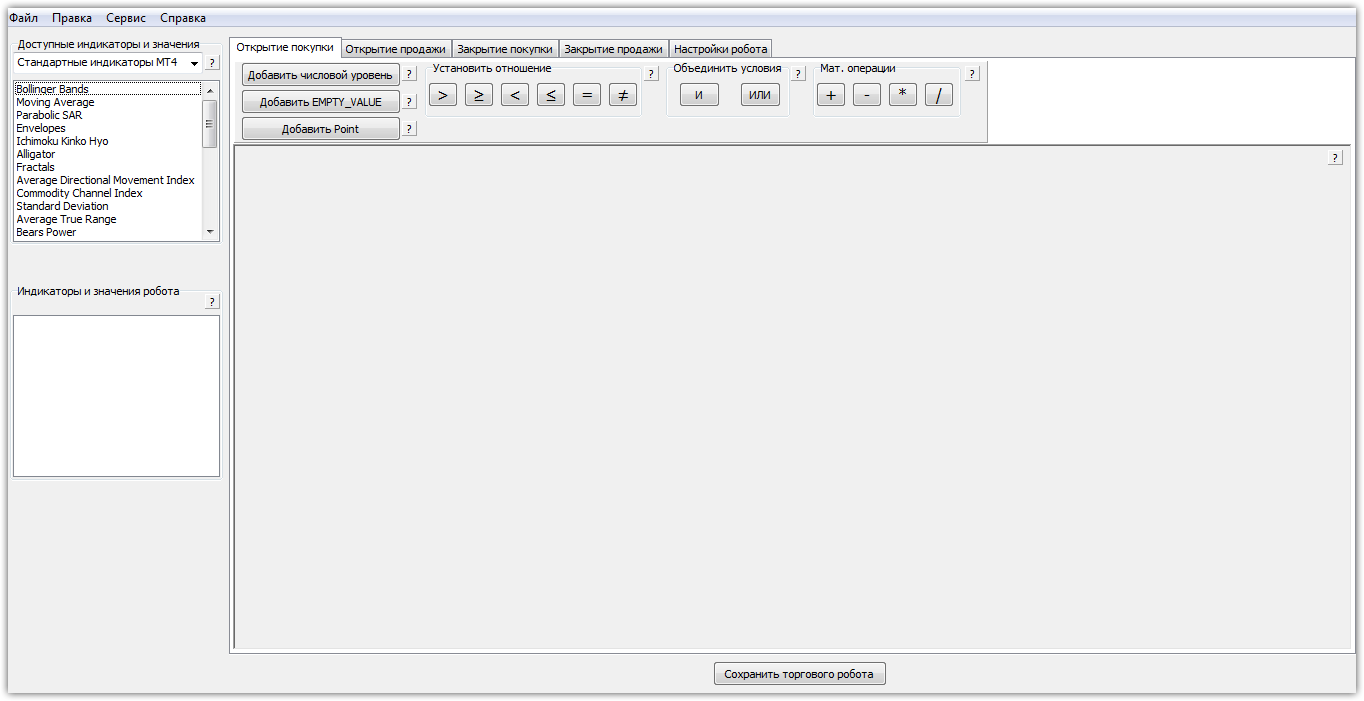
To give the correct path, go to the file menu of your platform and launch the data directory. Copy the top line with the folder addresses and paste it into the appropriate line using the proposed program. After the first launch, you will see this program interface:
Program functionality
As we already mentioned, the free version is quite stripped down, so on a free basis you can create advisors and save them in the required format based only on standard indicators.
If you purchase the paid version of the product, you will be able to create your own advisors based on custom indicators. Also, for convenience, in the paid version it is possible to transfer variables and settings directly from a previously saved template.
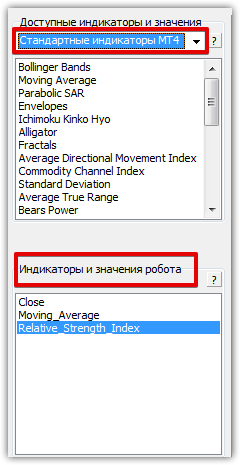
In the upper left corner there is the most important panel on the basis of which the future robot is built, namely “Available indicators and values”. By default, 30 different indicators are available to you, such as bollinger bands, moving averages, standard oscillators.
In the same window, you can switch the checkbox to functions. “price and volume values.” In this section you can select the opening price, closing price, volume, high and low prices. All these values are urgently needed for construction without indicator tactics.
Below the “Available indicators and values” window there is a window called “Robot indicators and values”. This special window displays the variables and indicators that you will apply to the workspace if you create a robot.
Directly at the top you can see five tabs, namely opening a purchase, opening a sale, closing a purchase, closing a sale. In each tab, you must specify the conditions for opening and closing transactions.
It is for the first four menus on the panel that there are a number of special options, such as comparing variables, adding numeric levels, adding special conditions, adding item values, as well as simple numerical operations. The panel view can be seen below:

After working with the robot’s conditions, it is important to make its final settings in the “Robot Setup” panel. Directly in this tab you can set the profit and stop values of the order, specify slippage, set a special code to recognize your own orders, and also set comments.
Also in this window there is an option to enable martingale. However, I would like to warn you not to confuse Martingale with averaging. When martingale is enabled, the advisor will close positions based on a stop order, but each new order that will be opened based on a signal will have a double lot.
When enabling martingale, do not forget to set the minimum and maximum lot.
Also in the final window you can enable the function trailing stop and without loss. To enable the trailing function, check the box next to “Use” and specify the trailing size and trailing step.
To enable the function without loss, go to the appropriate tab and in the “Profit for installation” line, set the profit value in points.

In conclusion, I would like to note that the Ensed Cor designer, even in free mode, allows you to create complex advisors without any programming knowledge, since the interface is visually clear even at first glance.
And in the next article we will create a simple martingale-based advisor together with you and clearly show how the program works.
Download the Ensed Cor constructor